
Transforming a Home with a RAL 7015 Decorative Epoxy Floor
A Full-Home Resin Flooring Installation in Stockport
Creating a seamless, durable, and luxury floor requires far more than pouring down resin. Behind every flawless surface lies a combination of expert surface preparation, technical application, and high-quality materials. At Epoxy By Design, preparation is the foundation of everything we do — because without it, no resin system can perform or last as intended.
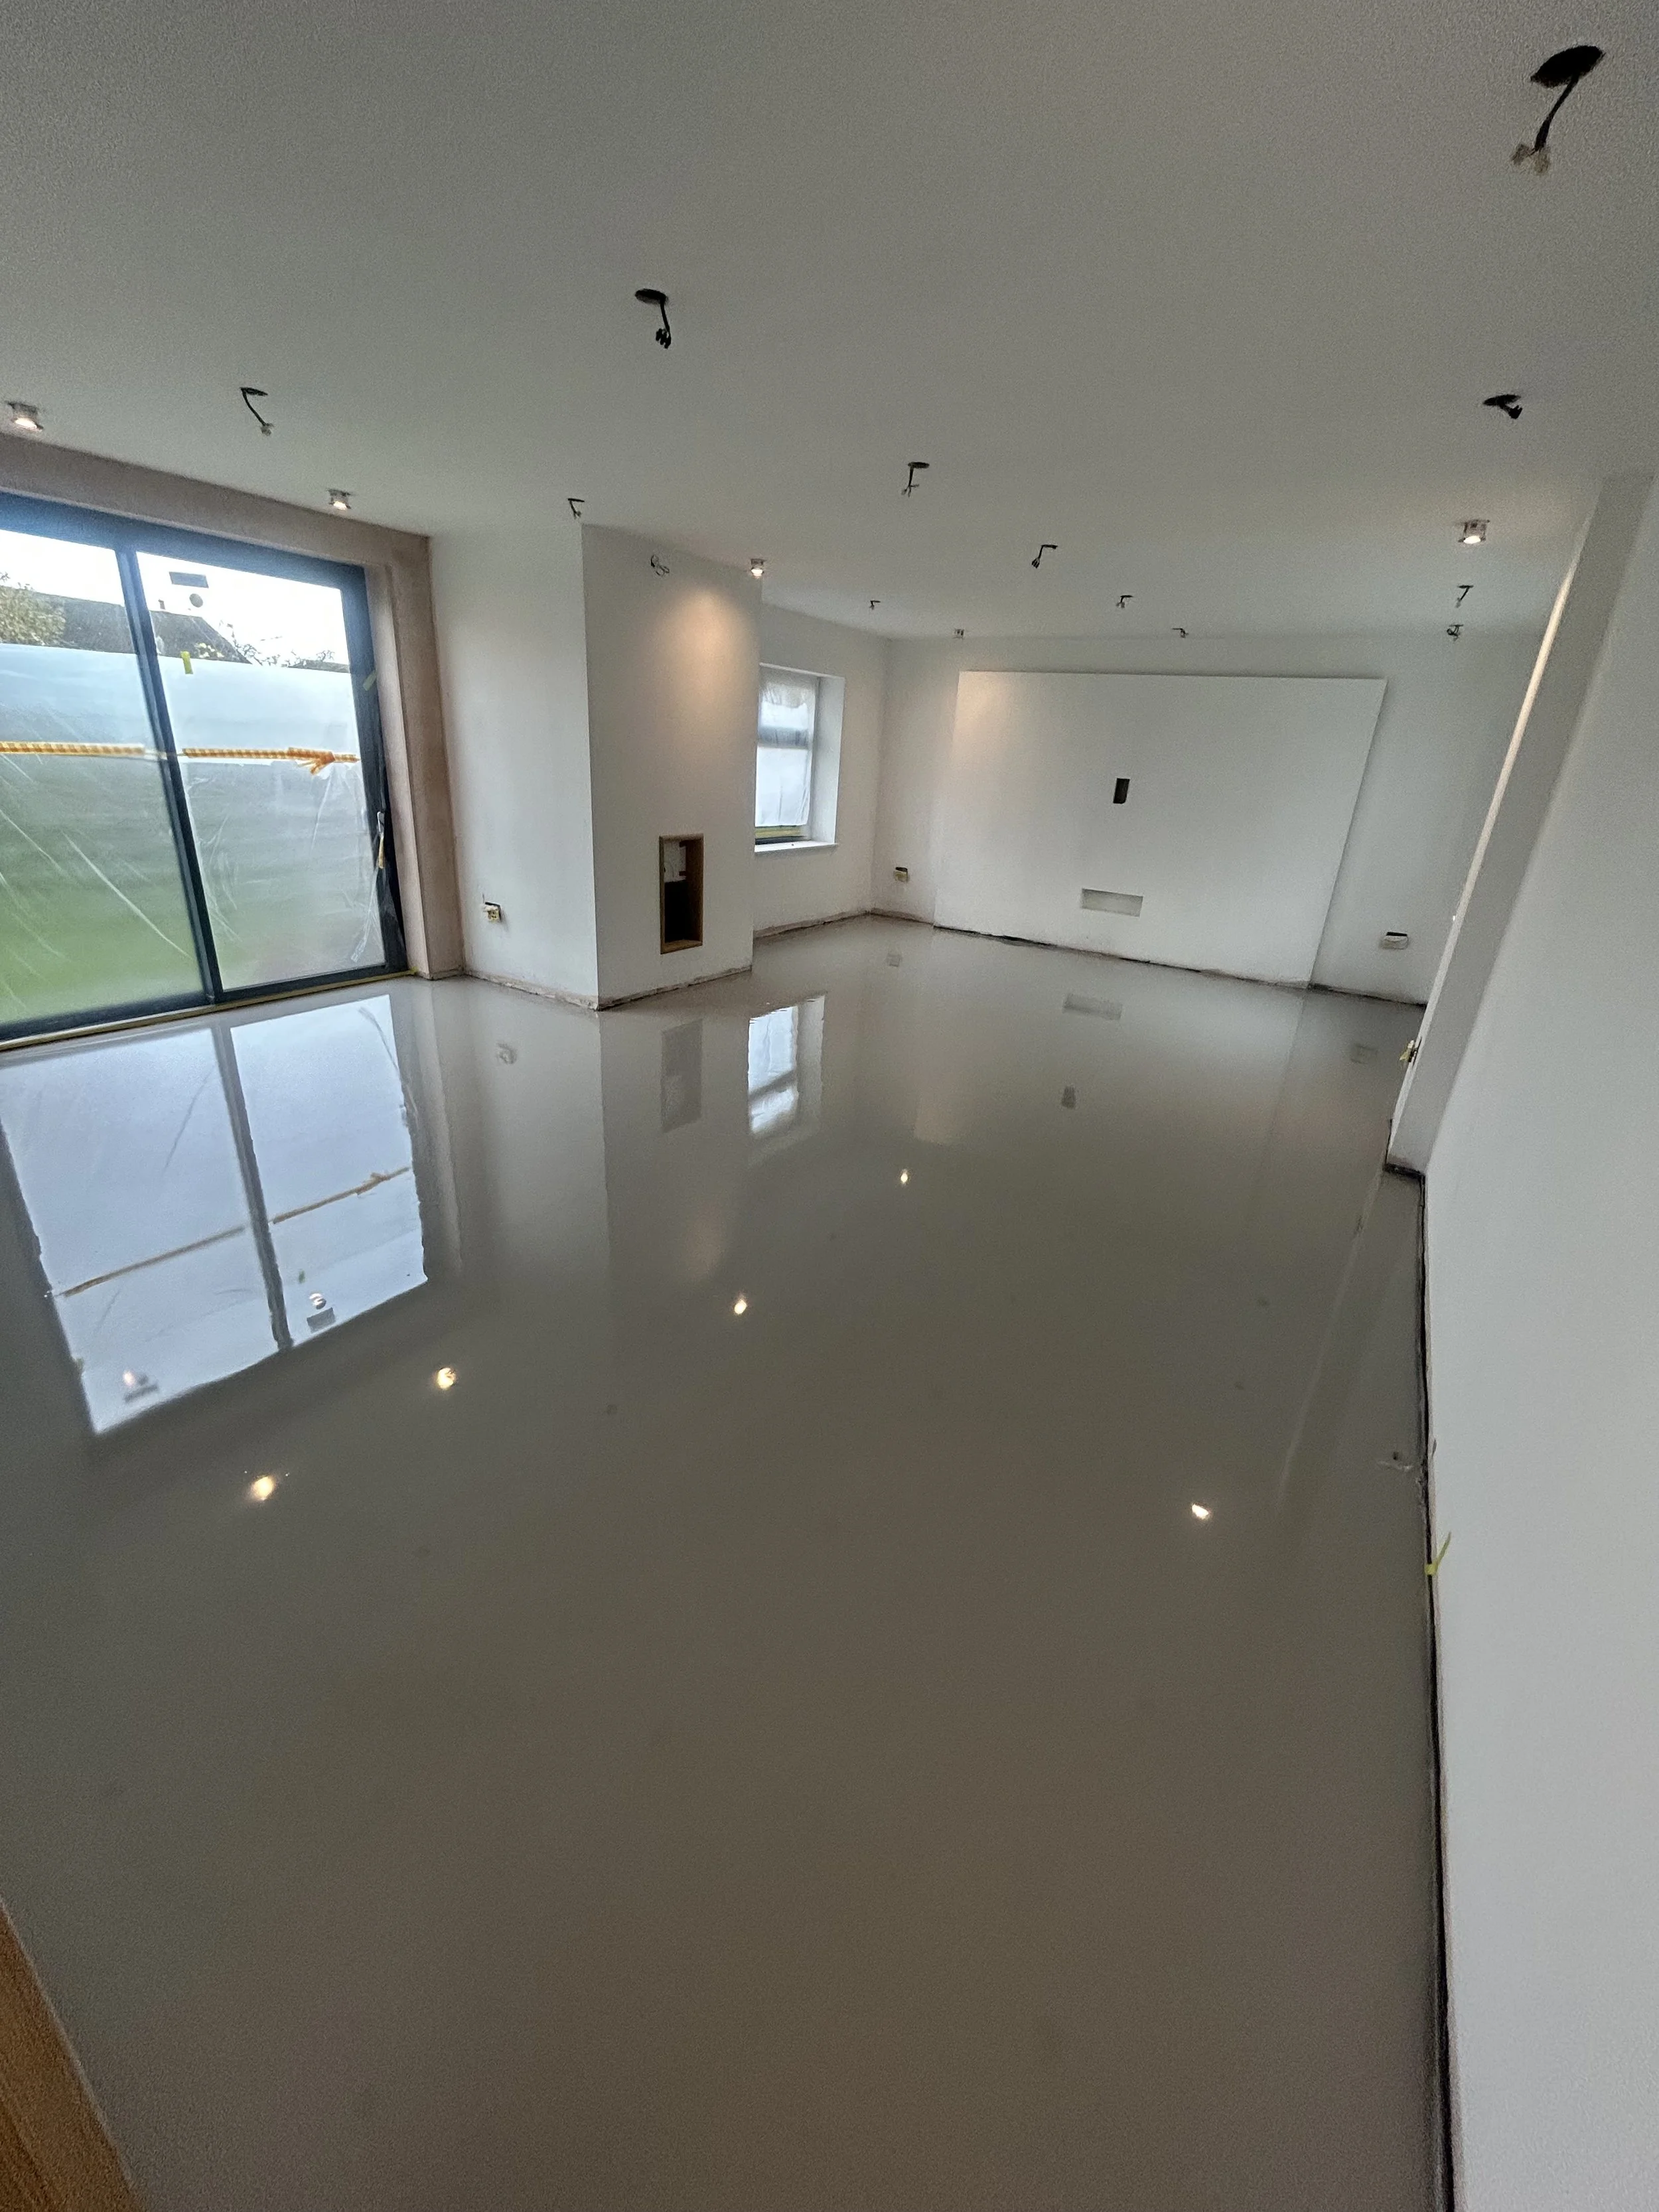
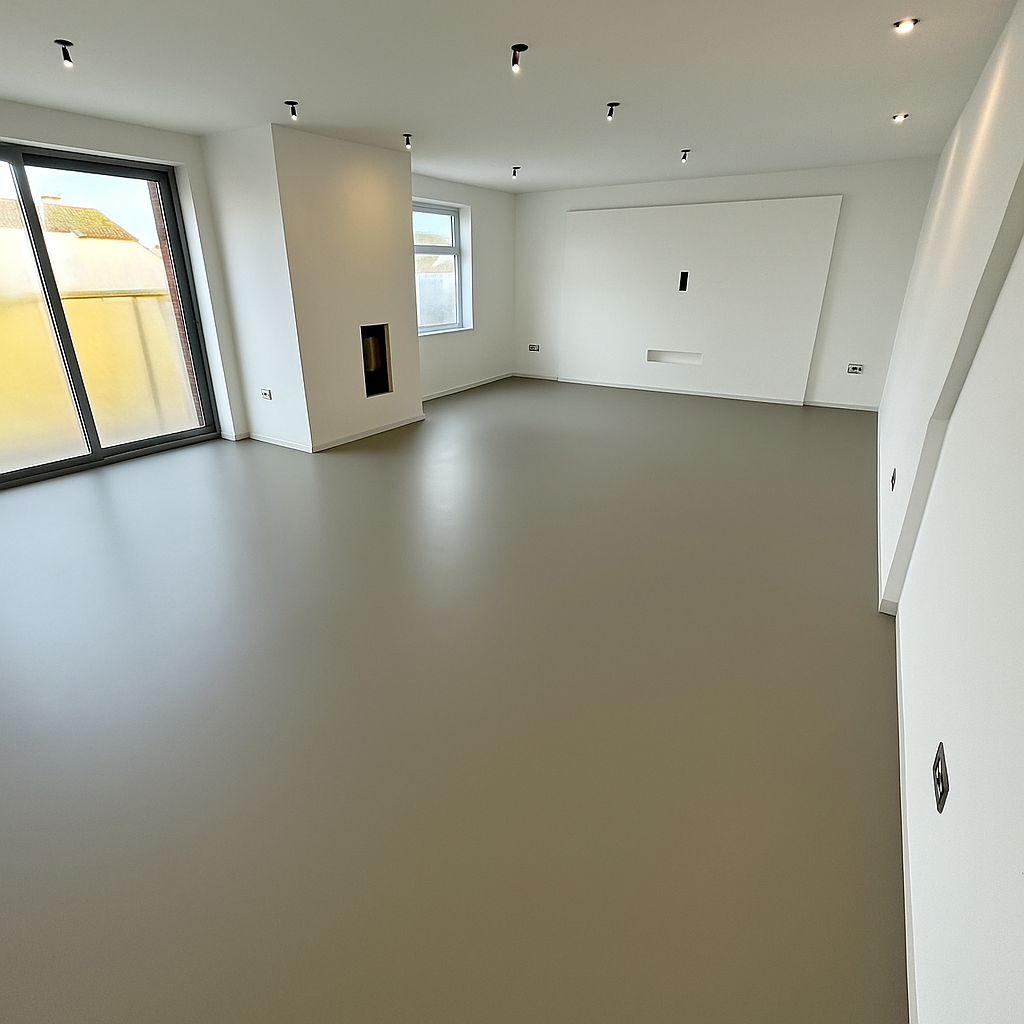
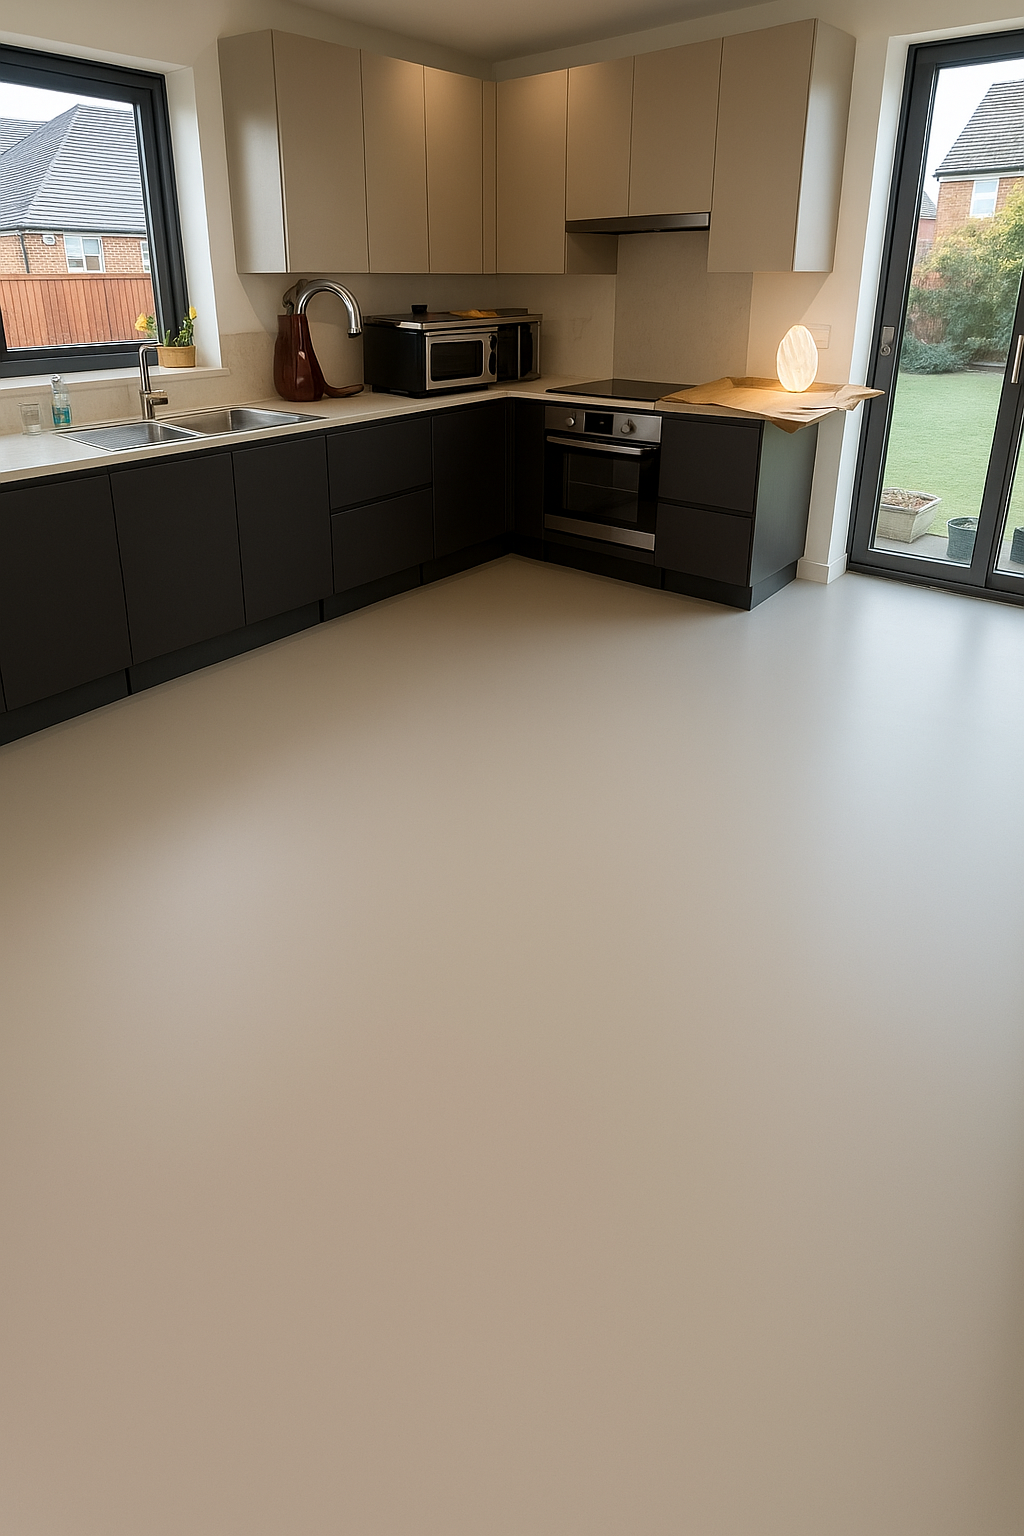
One of our most recent showcase projects involved installing a full-ground-floor decorative epoxy resin flooring system in RAL 7015, complete with a subtle, sophisticated 1% glitter top coat. Covering 120m² across an entire home, this installation transformed a problematic and poorly laid screed into a breathtaking, modern and functional resin surface.
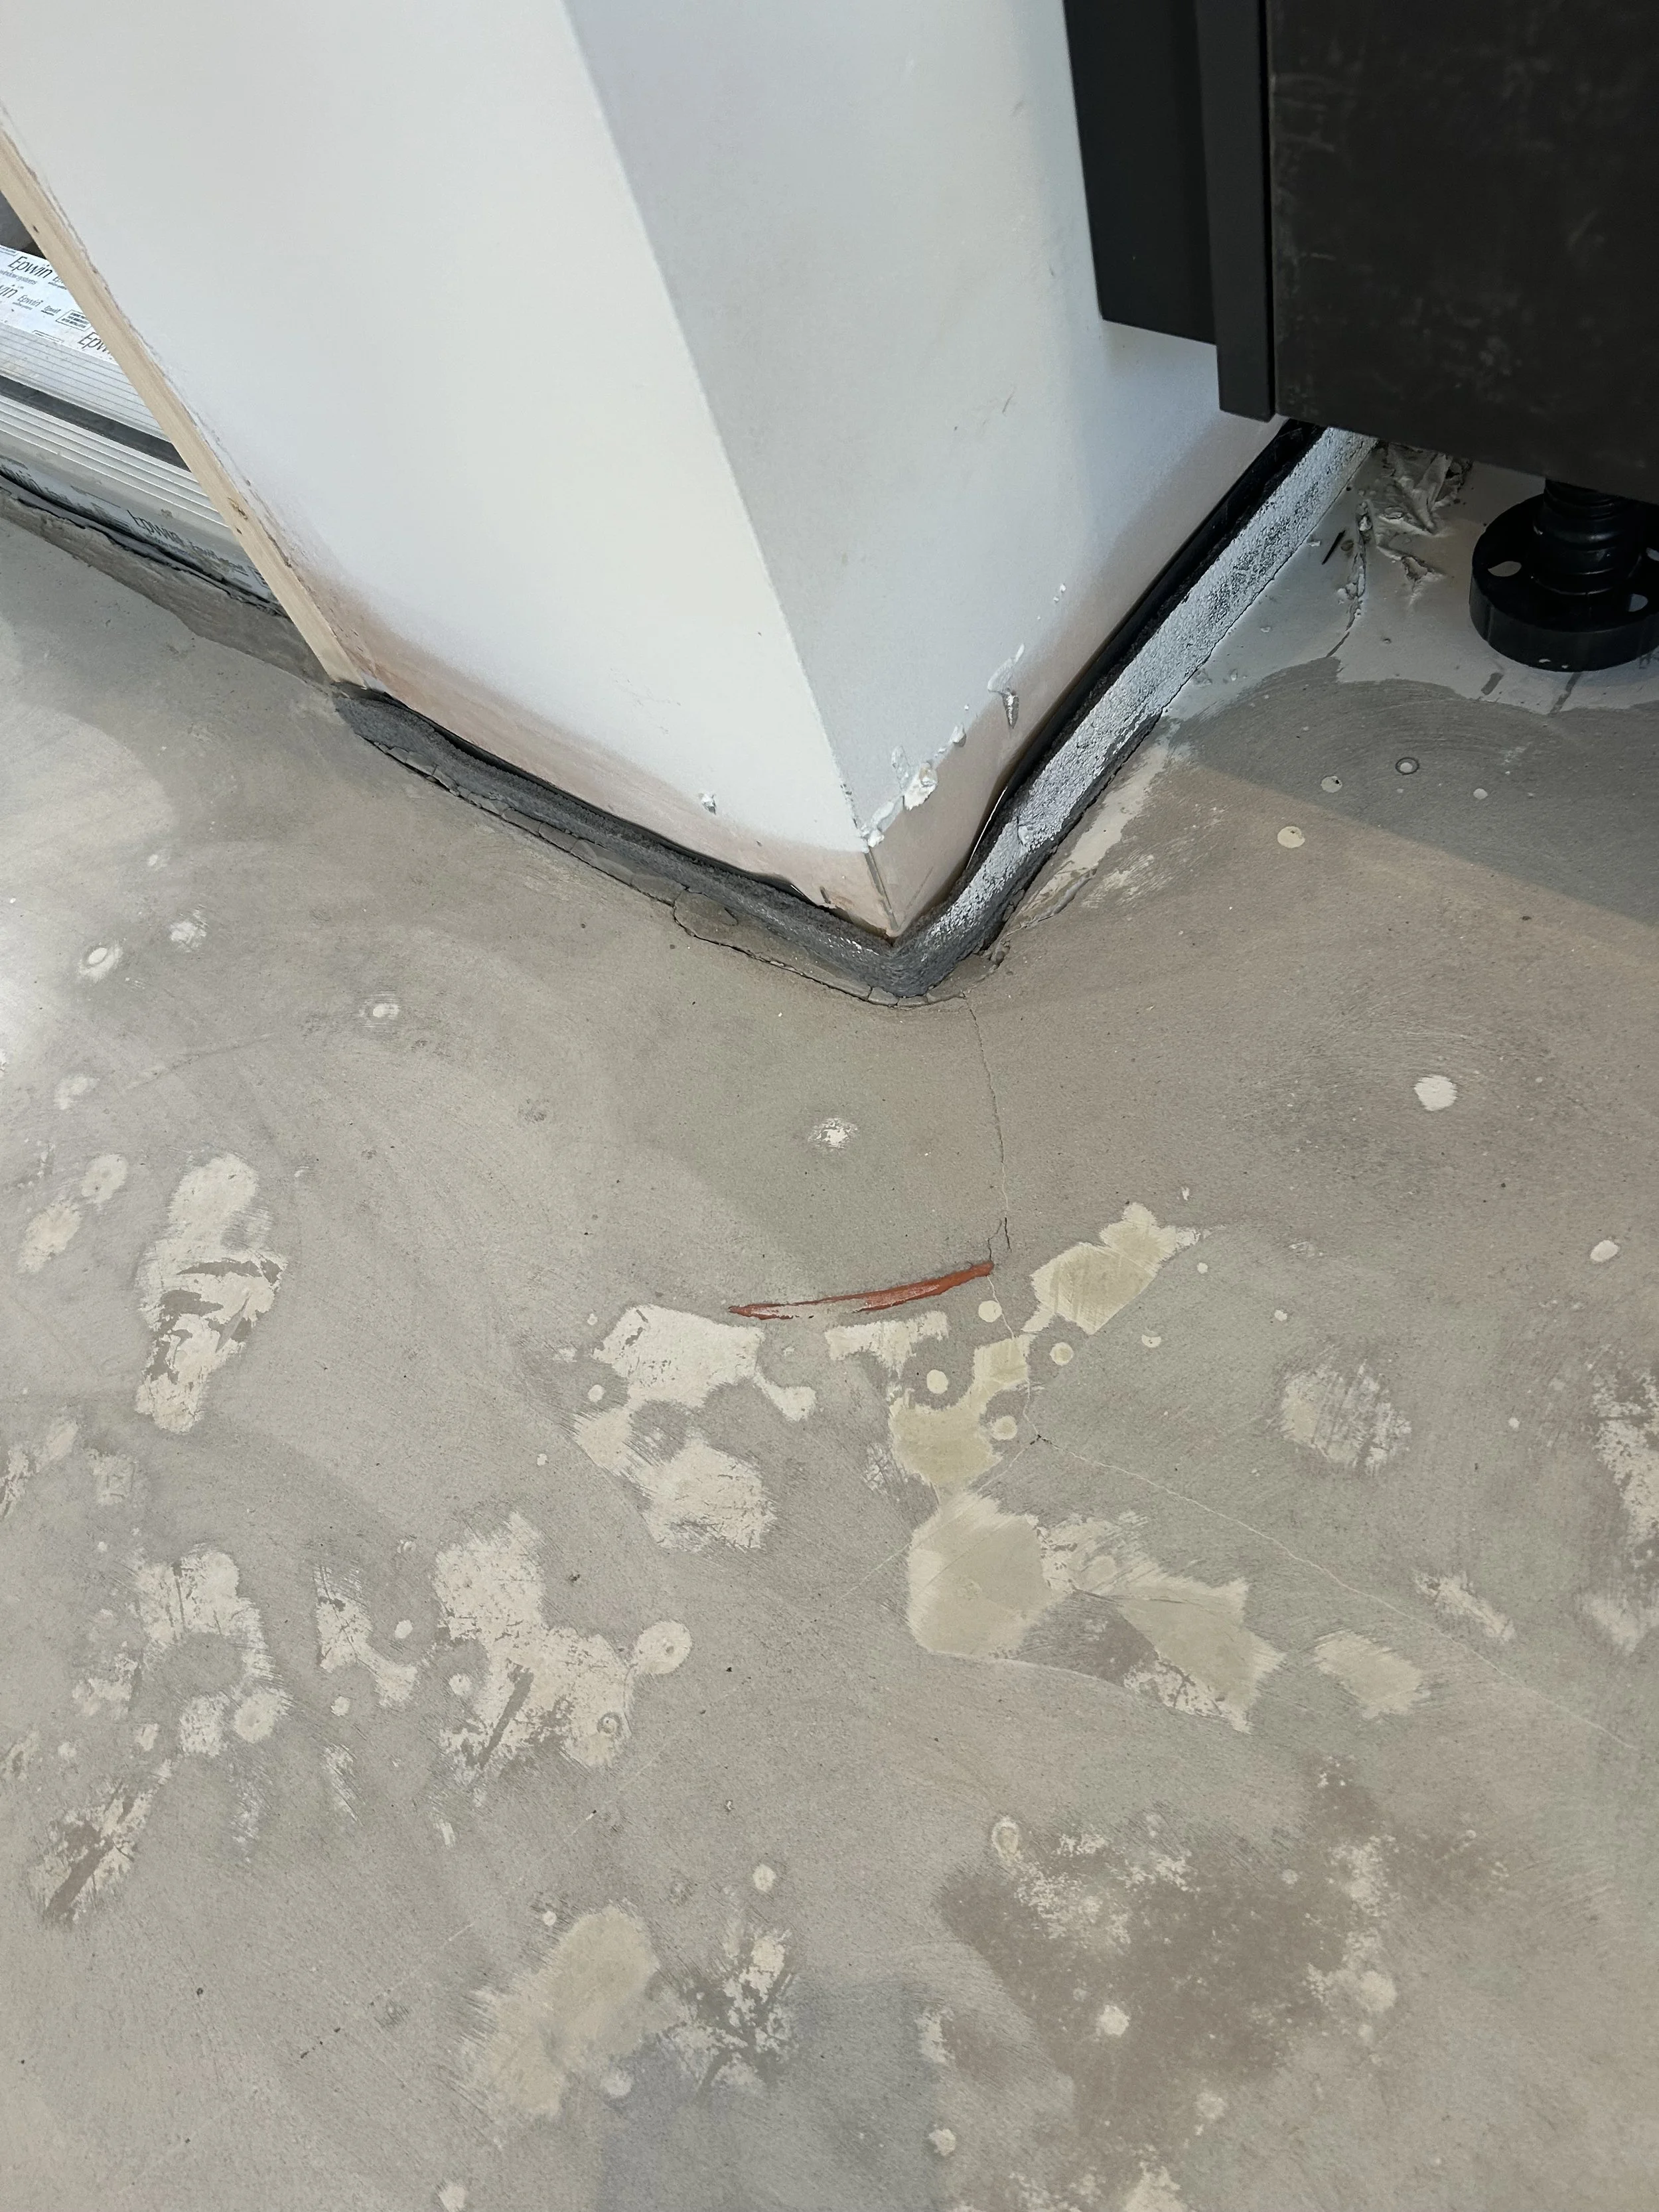
The property, located in the heart of Stockport, required extensive grinding, filling, repairing, sealing, and resurfacing work — far beyond what a normal epoxy flooring installation would involve. With large gaps around the perimeter, weak edges, severe pinholing, uneven levels, and surface contamination, the screed below was a major challenge.
Yet through expert grinding, mechanical prep, specialised fillers, and our advanced resin systems, we restored the base and installed a seamless living room epoxy floor, resin kitchen floor, wet room coating, and continuous luxury flooring throughout the ground level.
Why Resin & Epoxy Flooring Continues to Dominate Modern Interiors NFL
Whether you’re creating epoxy wet room flooring, a living room marble floor effect, or a high-end resinous floors installation for your entire home, resin and epoxy systems offer unmatched benefits. They are fast becoming one of the most requested interior flooring options due to their:
Seamless modern appearance
Long-lasting durability
Waterproof coating functionality
Hygienic, easy-clean properties
Near-limitless design customisation
Compatibility with underfloor heating
Ability to replicate marble, stone, and metallic effects
Today’s homeowners are choosing resin not just for its practicality, but for its premium, elegant aesthetic.
Project Summary:
A 120m² RAL 7015 Resin Flooring Installation With Glitter Matt Finish
Our client wanted a single, unified flooring system across the entire ground floor — stretching from the living room to the kitchen, hallway, utility zones, and wet areas. They selected RAL 7015, a deep, modern grey tone that perfectly suits open-plan homes and pairs well with both minimalist and warm interior styles.
To add character without overpowering the design, we incorporated 1% glitter into the top coat, creating a luxury shimmer that comes alive under natural and artificial lighting.
But before we could even begin applying epoxy, we had to address the real issue:
The substrate was nowhere near suitable for a resin installation.
Exposed underfloor heating pipe due to not being installed properly
The Screed Challenge:
Gaps, Pinholes, Uneven Levels, and a Weak Surface
The screed laid by the underfloor heating contractor posed significant structural and surface problems:
Huge gaps around room perimeters
Thousands of pinholes across the entire surface
Inconsistent levels and dips
Weakened edges along walls and thresholds
Dust shedding and friable (crumbly) areas
Surface contamination from UFH installation
If applied directly over such a surface, resin would:
Bubble
Delaminate
Sink into the pinholes
Fail to bond
Crack and flake over time
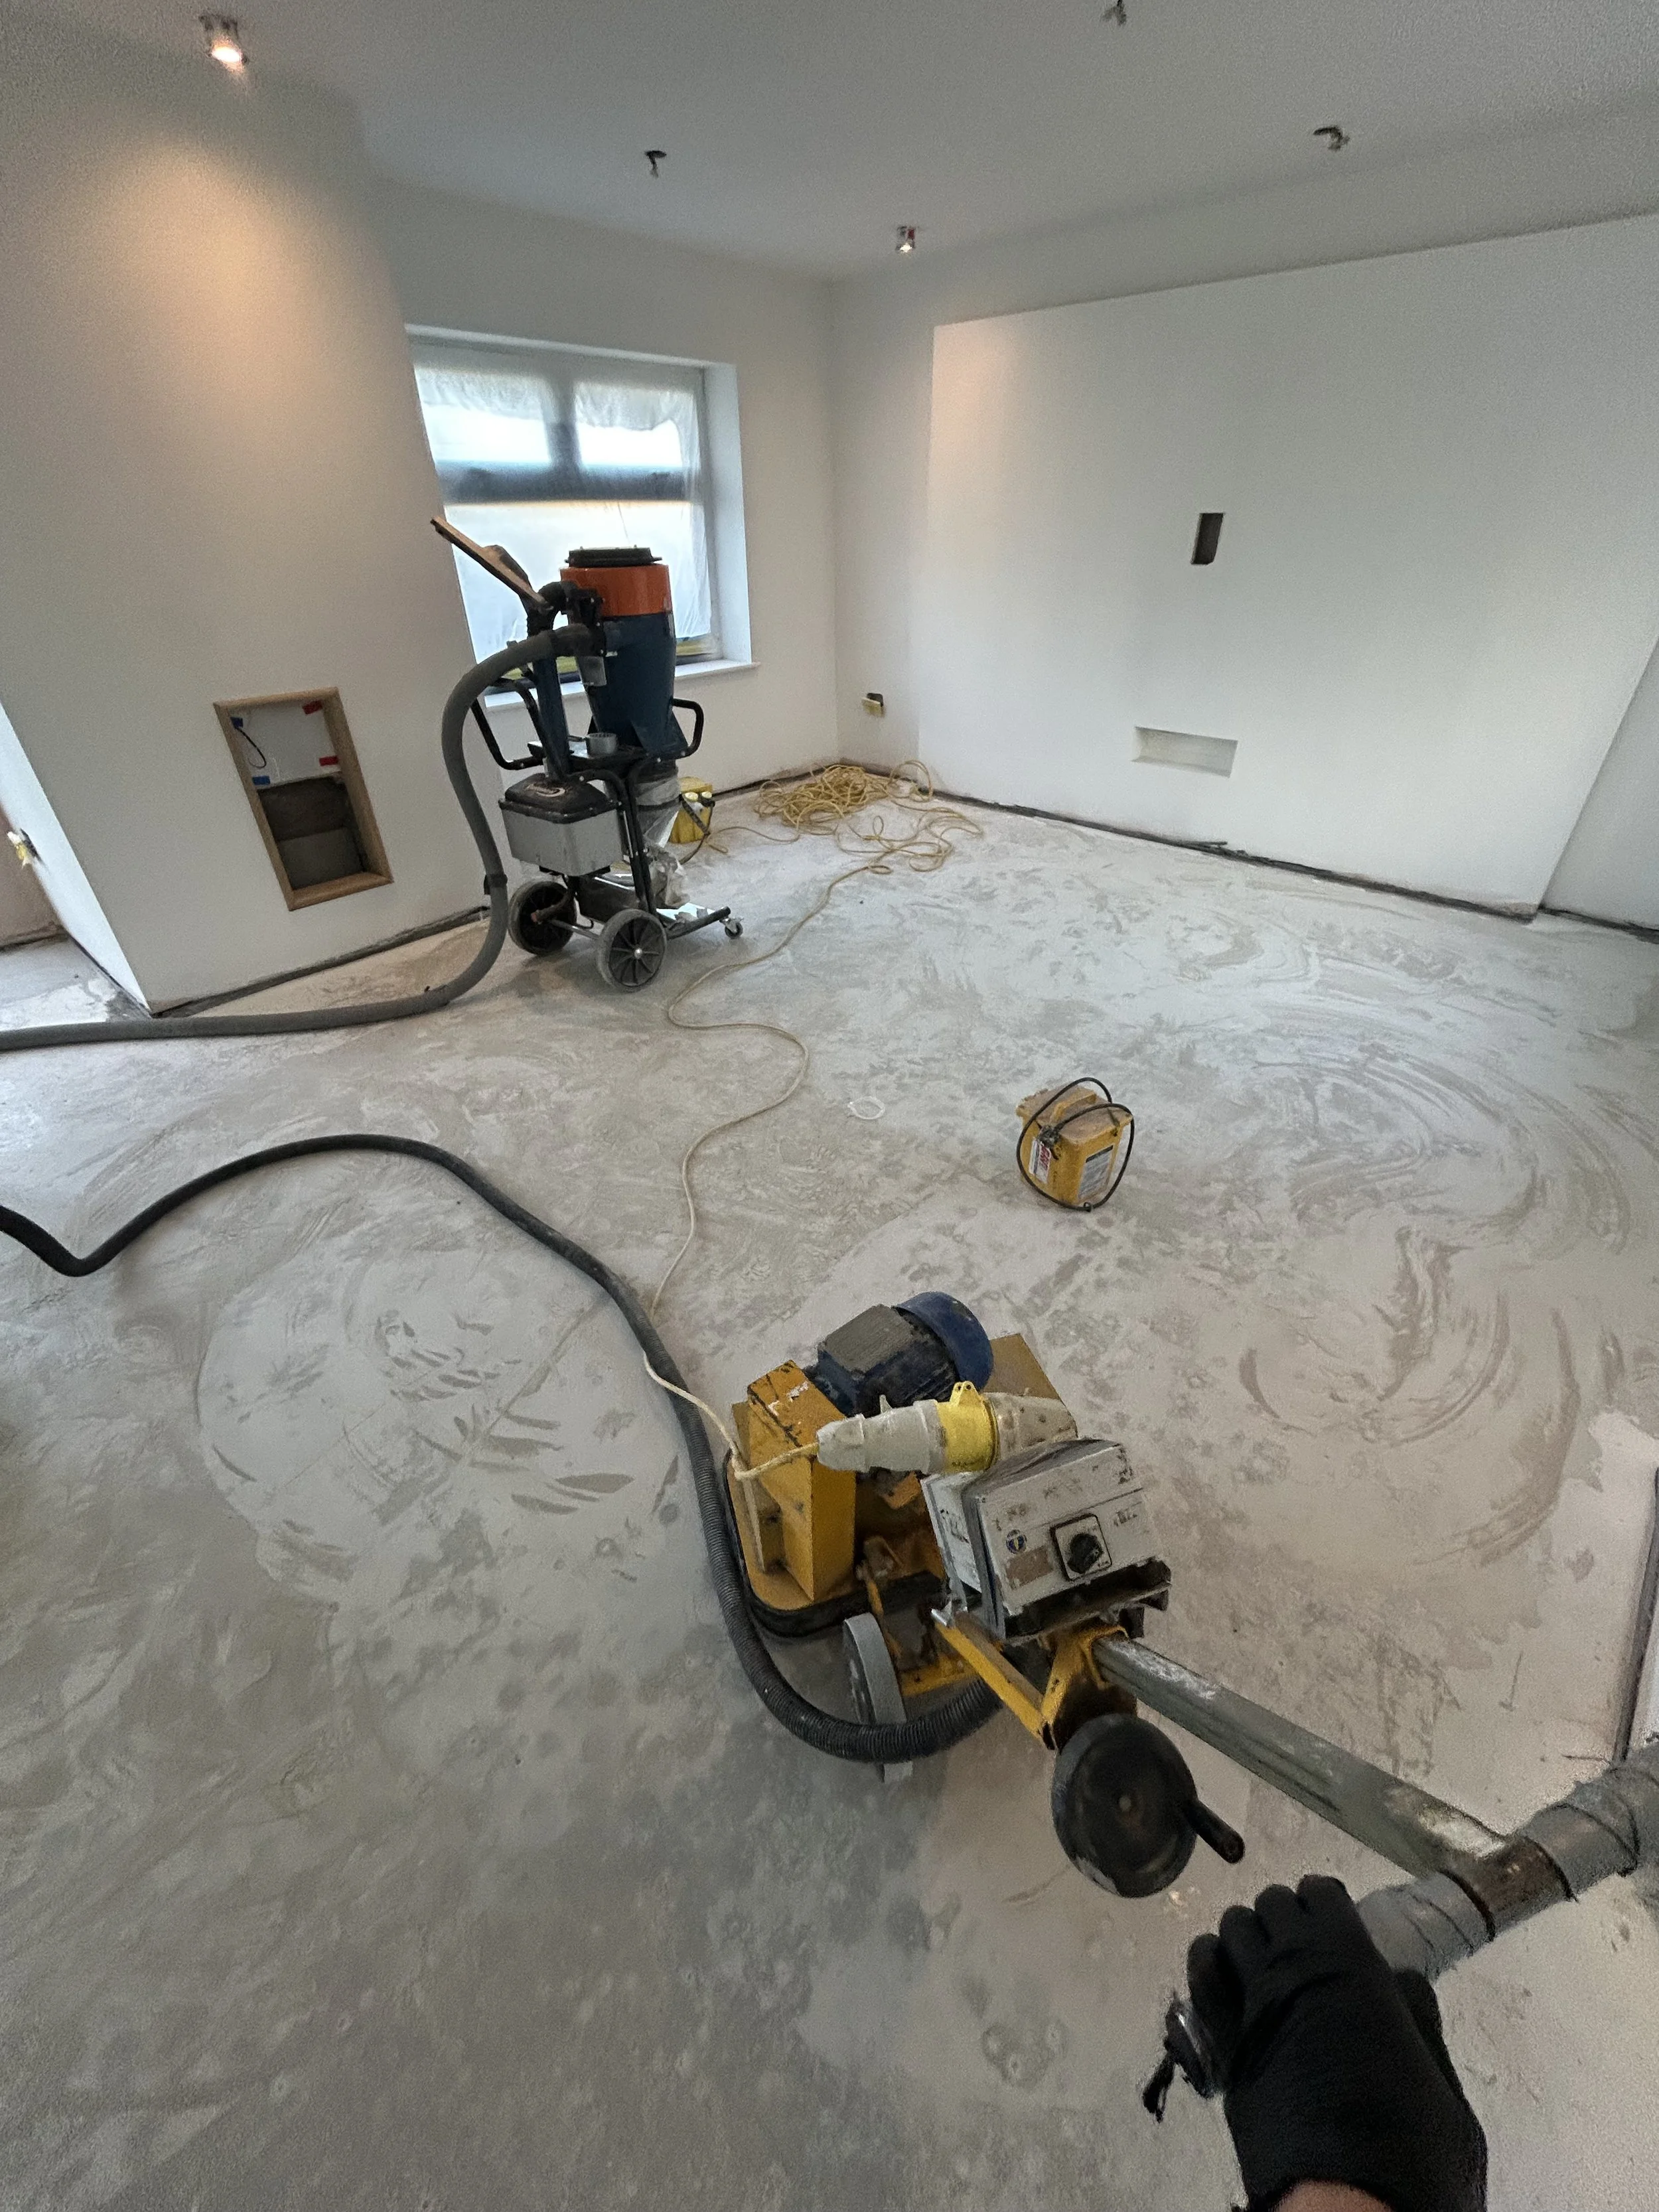
Every successful epoxy flooring installation begins with engineering the perfect base — and in this case, our surface preparation work was one of the most crucial phases of the entire project.
The Most Important Part of Every Resin Installation:
Grinding & Mechanical Prep
High-quality resin flooring, whether it’s a resin kitchen floor, living room epoxy floor, or epoxy coated garage flooring, can only perform as well as the substrate beneath it. That’s why grinding and mechanical preparation are essential steps in professional resin installation.
Here’s how we approached this project:
1. Full Mechanical Grinding of the Screed
We used professional planetary grinders to:
Remove surface laitance
Eliminate weak and dusty layers
Open the pores of the screed
Establish a proper mechanical key
Reveal any hidden issues (cracks, voids, soft areas)
Create a consistent profile across the entire 120m²
This is a vital step because resin does not bond properly to dusty, smooth, or contaminated surfaces. Grinding ensures the substrate meets the required standard for adhesion, longevity, and visual consistency.
2. Edge Grinding and Corner Profiling
Large perimeter gaps meant the edges required special attention.
We used hand grinders fitted with diamond tooling to:
Cut back weak edges
Remove loose screed from the perimeter
Shape and clean corners
Ensure all edges were strong enough to accept resin
Edges and corners are the most common failure points in resin installations — which is why we treat them with the same precision as the main floor area.
3. Pin Hole Identification & Surface Vacuuming
The thousands of pinholes created by poor screed installation required meticulous preparation.
After grinding:
We vacuumed the surface to extract dust from within the pinholes
Inspected every zone to map the worst areas
Identified air pockets and micro-voids
Marked areas needing deeper repair
Pinholes left untreated lead to bubbling, cratering, air release, and long-term coating issues — so this phase is essential in every epoxy and resin installation.
4. Filling, Levelling & Perimeter Reconstruction
With a fully ground and open-pored surface, we began substrate repair:
Epoxy repair mortar was used to rebuild the perimeter gaps
Resin fillers were applied to seal the pinholes
Leveling compounds corrected dips and undulations
Crack repairs ensured long-term structural stability
This stage dramatically improved the floor’s structural integrity and prepared it for priming.
5. Moisture-Tolerant Priming
Once the surface was restored and repairs cured, we applied a specialist epoxy primer designed to:
Penetrate deeply into the screed
Lock down any remaining micro-dust
Create a high-adhesion bonding layer
Seal the substrate to prevent air release
Stabilise the surface at a molecular level
This is another critical anti-pinholing and anti-bubbling stage.
6. Additional Pin Hole Sealing (Where Required)
Even after grinding and priming, some areas required further attention.
We re-sealed isolated pinholes using:
Epoxy slurry coats
Hand trowel fillers
Fine detail work near edges and fixtures
This meticulous approach guarantees a flawless finish in the final resin layers.
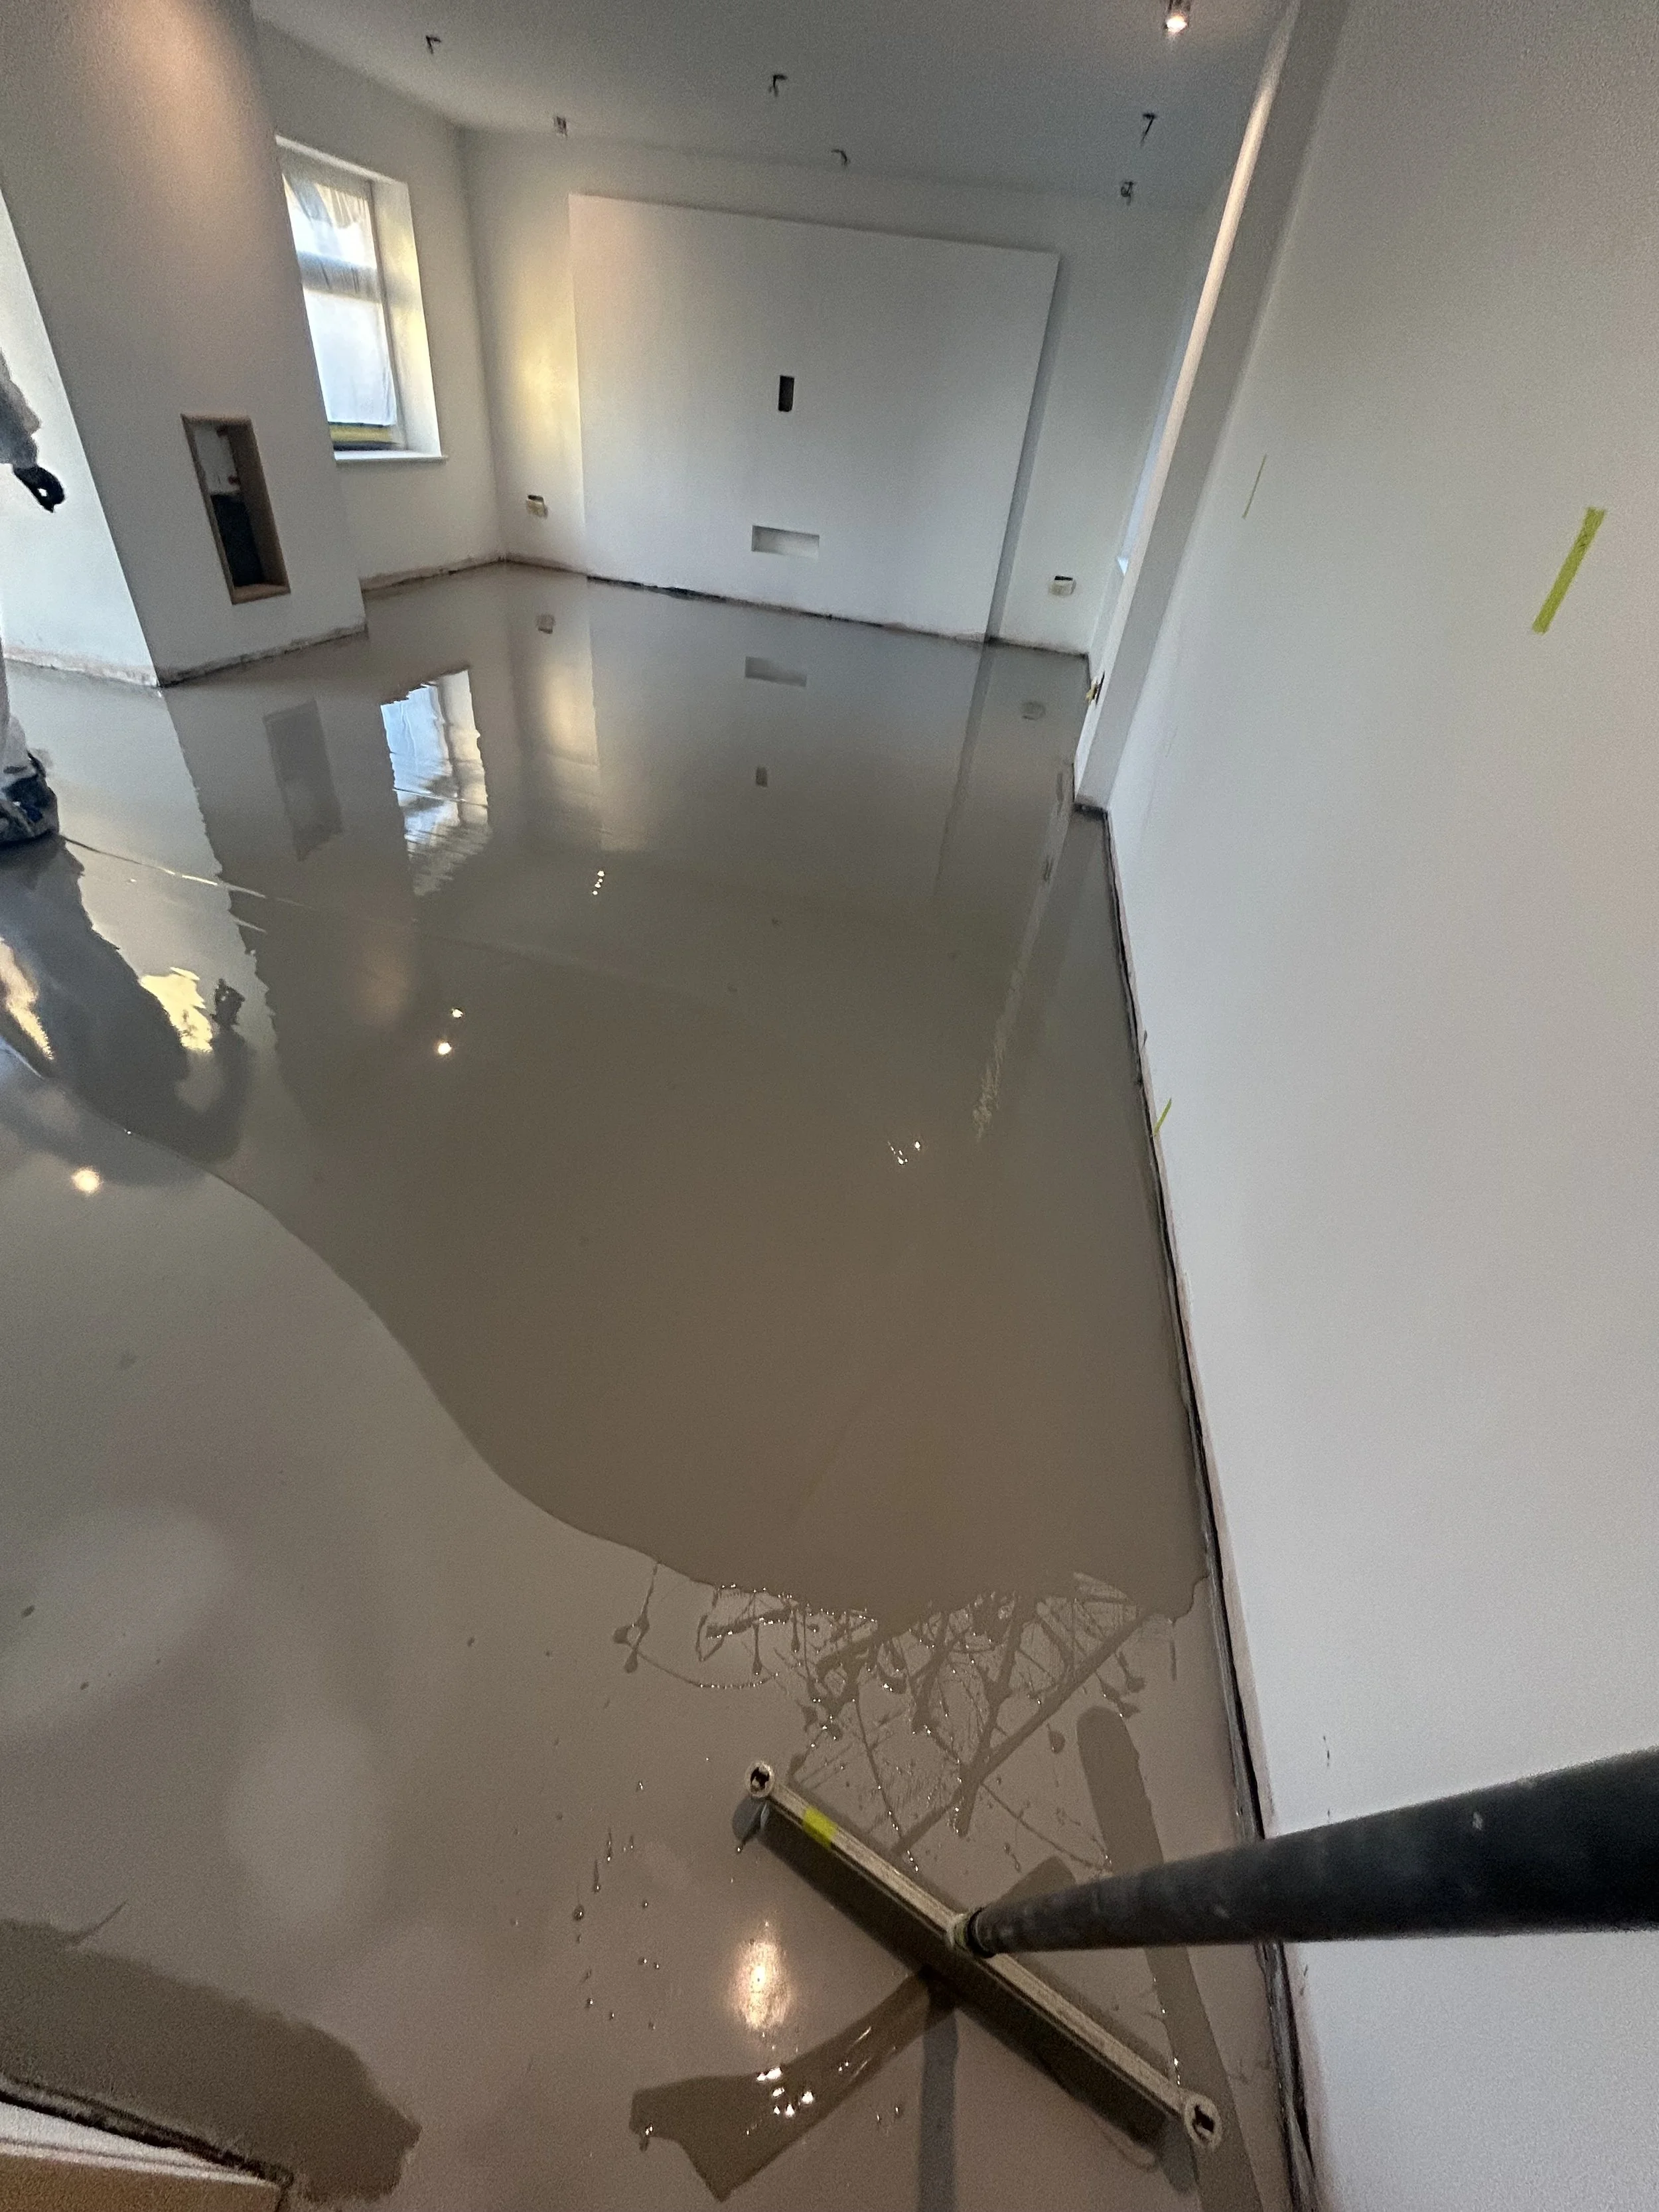
Installing the RAL 7015 Decorative Epoxy System
With the floor now structurally sound, sealed, and perfectly prepped, we began the decorative application phase.
1. Base Epoxy Layer
We mixed and applied the RAL 7015 epoxy resin to create:
A uniform colour foundation
Consistent flow across the open-plan layout
A smooth surface ready for the build coats
2. Epoxy Build Coats
Multiple coats were applied to:
Achieve the correct thickness
Enhance durability
Ensure opacity and colour depth
Create a luxurious, seamless appearance
3. Glitter Matt Top Coat (1%)
The finishing touch:
• A protective matt top coat
• 1% glitter dispersed for subtle shimmer
• Full waterproofing
• UV-resistant protection
• Superior scratch resistance
This top coat is what transforms a standard resin floor into a luxury flooring system with both aesthetic appeal and long-term performance.
Final Result: A Luxury Home Flooring System That Will Last Years
After extensive grinding, repairing, priming, and careful epoxy application, the transformation was remarkable.
The new resin floor delivered:
• Completely seamless, modern interior flooring
• Full coating waterproofing throughout the home
• A durable, hygienic and long-lasting finish
• A unified, luxury visual flow across all rooms
• An elegant matt RAL 7015 tone
• A tasteful, subtle glitter accent
• A fully sealed resin kitchen floor, living room resin floor, and wet room areas
• Perfect compatibility with underfloor heating
• A floor designed to last decades, not years
What started as one of the most problematic screeds we’ve encountered has become a flawless showcase of premium resin design.
Why Choose Professional Resin Flooring Contractors?
Anyone searching for flooring installation contractors near me will quickly discover that resin flooring is a specialist trade requiring:
Professional grinding equipment
Moisture testing
Repair expertise
Deep knowledge of resin chemistry
Advanced application skills
A floor like this cannot be achieved with DIY kits or inexperienced installers.
Every step — from grinding to curing — demands precision.
At Epoxy By Design, we specialise in:
Decorative epoxy resin flooring
Epoxy wet room flooring
Metallic epoxy floor designs
Marble-effect resin floors
Bespoke flooring solutions
Epoxy coated garage flooring
Waterproof coating systems
Resin for floors in domestic, commercial, and luxury environments
Conclusion
This project stands as a perfect example of how expert preparation, professional craftsmanship, and high-end resin systems can transform even the most problematic substrate into a breathtaking floor.
Our grinding, mechanical preparation, pinhole treatments, and precision installation resulted in a seamless epoxy flooring system that elevates the entire home.
The RAL 7015 matt finish with 1% glitter creates a subtle yet refined aesthetic, offering both elegance and durability. The homeowners now have a luxury flooring system that is:
Seamless
Waterproof
Strong
Modern
Easy to maintain
Beautiful in every room
A true investment in their property’s long-term value.